Showing posts with label Colour Me. Show all posts

Saturday, May 18, 2013

Randomised Mani-Double Dots

Ever since I saw the first Tri Polish post (run by The Crumpet's Nail Tarts) I've been a bit intrigued with the idea of doing a mani with no control over the colours used in it. I haven't yet decided if I'll join in with the challenge, but it's something I'm considering for when the ABC challenge ends (Sob!)
I have a habit of using the same colours over and over again for my manis because they're the ones my eye is naturally drawn to so I decided to set myself a similar challenge-I'm calling it the Randomised Mani. Basically, using a random number generator, I select the number of polishes for the challenge (between 2 and 10) and then the actual ones I'm going to use. I have my swatch wheels all catalogued in a book (because I'm a nerd!) and so just kept selecting random numbers which represented a polish. I'm not explaining this very well but basically I didn't pick them by choice but by chance! I also gave myself the option to veto one polish from the lot if it didn't fit very well.

So for my first Randomised Mani these were the polishes that got chosen:


 Colour Me-Pure Gold, 17-Nightshade, Rimmel-Sunrise and Kleancolor-Jewelry Red (It really pains me to have to spell jewellery wrong because it's the polish name!)
I decided that the orange didn't really fit with the opulence of the other colours so I got rid, leaving me with three polishes. I really liked the double dot effect on my little finger in my Fabulous mani the other day so I recreated that here.

I used two coats of Pure Gold and three of Jewelry Red as bases and was suddenly struck with the thought that they really look like the colours used for Tony Stark's Iron Man suit! (Yes, I'm a big nerd. But Iron Man 3!! *fangirls*) Had I not already decided what to do I might have attempted an Iron Man mani but alas (earwax) it was not to be, today.


I added dots in the opposite colour down the sides of my nails, then black ones on top. My camera really didn't like photographing this at all so I've done the best I can!


 What do you think? I reckon it's not too bad! I think the red dots look like poppies, which is quite cool. I'll be doing this random challenge every so often-at least once a month, perhaps more if I get stuck for inspiration.
Hope you enjoyed this mani!

Edit 19/5: I can't believe I never realised how pretty this gold was before-it's actually full of tiny green and orange shimmery bits and is such a lovely colour! Hard to believe it cost £1.99 and is a cheap brand I've never seen anywhere else!

~Nail Art Novice~

Sunday, April 14, 2013

ABC Challenge: N is for Nautical

Ahoy Sailor is the alternative title for this post ;)

In case you didn't spot my mini announcement at the end of my last post, I've joined a nail art challenge group and am participating in an ABC challenge hosted by the lovely Kimberly at Kimber's Lacquer Korner. The idea is to post a mani that features a polish/brand/technique/nail art design etc in each letter of the alphabet and this week is N (because I joined half way through! But I intend to start at 'A' after completing 'Z' if all goes well.)
I didn't really have any good polishes for 'N' so I thought I'd go with a nail art design in Nautical style.

Polishes used were: Colour Me-Colour Me White, Maybelline-Dark Denim, No 7-Siren and Colour Me-Pure Gold. I used striping tape over a white base to create the stripy sailor-eqsue look and then freehanded the details using a dotting tool.


I really like this mani, it's cheerful and fun without being overwhelming and was really easy to do-bonus! I'm loving how vibrant that red looks over a white base too.

(Ladies who are visiting me for the first time from the link up [Hello!], please let me apologise for my less than perfect pictures. I hate cleaning up and I'm also really bad at it-no matter how long I seem to spend scrubbing away at my cuticles I never seem to get crisp neat edges like so many other people and I've yet to fathom how to do this apart from learning to paint neater. I've tried really hard before to clean up and just ended up removing the sides of my manicure instead, so now I tend to leave it looking a bit rough and ready-hope this isn't too offensive on the eye!)

Right, I'm off to swash some buckles and swab some decks (check me, I have the lingo and everything...), but do check out the other awesome ladies taking part in this challenge in the link-up below.

~Nail Art Novice~

Saturday, March 30, 2013

Some Flowers, Pretty Daisies, Might Relieve The Gloom

So the snow is just about melting away now, and I actually saw blue sky today, for the first time in ages. I'm daring to hope that Spring is actually waking up *fingers crossed* so I have painted my nails accordingly.

I recently treated myself to a couple of Spring colours from the Sally Hansen Complete Salon Manicure (SHCSM) collection which I knew would be perfect for this type of mani. These are polishes which, in theory, you can wear without basecoat and topcoat but knowing how long I like to keep my manis on for I didn't want to risk stains and chips so I used them as normal. (In case you're interested that's Sally Hansen Insta-Grip and Seche Vite.)

I started with my base colours of SHCSM-Grass Slipper and SHCSM-Fairy Teal reversing my accents as usual. They're both almost one coaters in terms of opacity, although I ended up doing three of each to even out visible brush strokes as they didn't apply especially well. I really love the colours though, they're pretty stunning and definitely right for spring time. I have a bit of a crush on Fairy Teal too, tealy-greeny-blues being my favourite colours!

Apologise for the blur, it didn't look blurry on my camera!
This is Grass Slipper with an accent of Fairy Teal

And this, of course, is the opposite.
The blue staining you can see isn't polish-it's printer ink and
 WILL NOT come off!

Then I took my dotting tools and my white Colour Me polish to add daisies to each nail, basically just placing them randomly. I find it kind of interesting that even though I was using the same tool size on each hand my flowers are much smaller on my right hand (done with non-dominant) than my left-and I think I actually prefer the smaller ones-except where they went a bit wonky! The flower middles are Revlon-Sunshine Sparkle and Rimmel-Tangy Tangerine which was a bit of a last minute addition because I hadn't anticipated how yellow the Grass Slipper would turn my white (and it was still out from my last mani.) I kind of like the effect though, it doesn't look out of place with the rest of the mani:


Overall I reckon this is a mani fit for Springtime, just need the weather to catch up and it'll be fab.

Just to let you know I'll be away next week, so apart from my 31 Blog Challenge post going up tomorrow, this is the last you'll hear from me for a week or so. Instead of me, next week you'll get posts from Rara instead, she's got some awesome Easter designs to share with you all. I'll still have internet access and be checking in though, so keep commenting and saying hello =)

~Nail Art Novice~

Title of post taken from Wait-The Sweeney Todd Soundtrack

Friday, March 15, 2013

Ridiculousness for Red Nose Day

Today is Red Nose Day in Britain where people across the country "do something funny for money"-trying to raise as much as we can as a nation to help vulnerable people both in the UK and third world countries. It's one of the things that makes me proud to be British-every year we have two massive fundraisers, one in March (Comic/Sports Relief) and one in November (Children in Need) and no matter how much of a recession we're in we always raise millions to help those who aren't as lucky as we are. I haven't done anything interesting this year but I will be donating some money, even if I can't afford much.
Every year they sell red noses to help raise money too, which are always a bit silly and fun-this year's are dinosaurs! This inspired me to do some Red Nose Day nail art complete with some ridiculous extra features which I've always wanted to try out-this gives me the perfect excuse!

Polishes used: Rimmel Wear Maxx-Serene (gorgeous shimmery shiny white), Rimmel Wear Maxx-Celebrity Bash (a beautiful dark blood red-I'm a sucker for these! Both these polishes cost me just £1 each from Poundworld-bargain!), Rimmel I Heart Lasting Finish-Double Decker Red, Colour Me-Colour Me White and details with my L.A Colors Art Deco striper.

This is 3 coats of Serene, it's very sheer but also very very pretty-almost pearly.

Next I added spots using Celebrity Bash and painted my accents with Double Decker Red. I'm still not great at getting my dots perfectly spread out and sized equally but I guess it comes with practice. I added white eyes to my accents and black pupils and smiles. Then I added my ridiculous features to my thumbs and voila! This is what I was left with:


GOOGLY EYES!! =D


My red noses with one of this year's Di-NOSE-saurs

I'm not expecting the googly eyes to stay on very long as they're not secured with anything other than a blob of topcoat underneath/round the edges but I love the fact that they look completely absurd and wonderful. I can't help but love this silly mani, it's just awesome. 

Are you guys doing anything for Red Nose Day?

~Nail Art Novice~

Tuesday, March 12, 2013

Try Something Tuesdays-Water Decals

I recently discovered YRNails water decals on Geordie Nails' blog and decided to treat myself and Rara to some (although Rara has only just discovered this and doesn't know which ones I've got her yet =p) because they have some really awesome designs but at prices which won't break the bank.
I got both the transparent designs and some full decals but this mani uses the partial ones, and I'm leaving the full ones for a braver day!
I had a couple of practises and they're fiddly little things so not great for someone like me who's clumsy and uncoordinated but I managed. They're not perfect but they still look really cool.

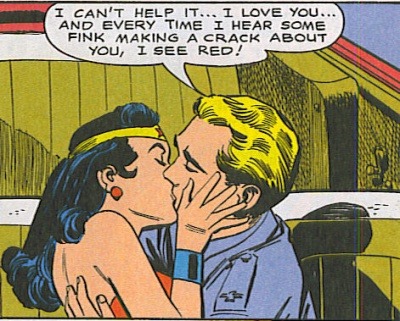
I chose these comic book style 'Pow' ones for my first time using them, and put them over what I consider to be "classic" comic colours-black, white, red, yellow and blue

Like this...can't understand how he's talking AND
kissing her at the same time though...
(Via)
Polishes used were the usual suspects: L.A Colors Art Deco-Black, Colour Me-Colour Me White, No 7-Siren, London Girl-Shade 148 and Barry M-Cobalt Blue.
I didn't want to waste a decal on a black polish so I did something a little different on my accent nails.


I was going to write 'POW' in my bubble but my nails are just too
teeny & I'm not that skilled! I like the exclamation mark too though.


I think these decals look really cool and I'm loving the retro feel to this mani. I was expecting them to be sticky once you removed the backing paper from them, but they aren't which means you can move them around until you are happy with their placing and then top coat the hell out of them to get them to stay there. They're not perfectly flat on my nails but I think that's more because I didn't cut them out perfectly so the edges have lifted slightly/because I didn't dry them all very well. You get 18 designs per pack, so I still have enough left to do a full mani if I wanted to-very good value for money at a pound a pack!
I think they're brill and will definitely be buying from them again in the future, as well as trying out my full patterned decals at some point too.

~Nail Art Novice~


Ooh and as a bonus here's a picture of one of my practice attempts over my mint nails:

I thought he was too cute not to share really.

Tuesday, February 26, 2013

Try Something Tuesdays-Saran Wrap Mani

Try Something Tuesday has rolled around again and I knew exactly what I wanted to do-Saran Wraps-but boy did I underestimate how annoying these would be to get right. I ended up redoing my left hand completely half way through which made me pretty grumpy and I almost wanted to give up on the whole thing. I'm glad I didn't though, I do actually really like the effect even if it was a pain in the bum to get right.
In the UK we don't seem to have access to this mythical Saran Wrap (I don't think) but I watched a couple of videos and it looks like a cross between cling film and cellophane (in that it stays rolled up in a ball if you scrunch it, but is definitely a bit crinklier and not as sticky-to-itself as cling film.). I went hunting around my kitchen for something that would work as effectively-cling film, kitchen foil and kitchen roll were my chosen subjects, and in the end I didn't use any of them! Cling film seems to be too smooth when it's scrunched up, it forms a ball that doesn't have enough rough edges to pick up the polish, foil is good but too sharp in that it punched all the way through my base colour as well, and kitchen roll is useless and fluffy.
I know I've read Saran Wrap tutorials where people used bits of old carrier bag, and was just about to go downstairs again (NB I do my nails in my attic bedroom, the kitchen is a long way away!) to liberate one when I saw something in my room that might work-bubble wrap! Now while it doesn't stay scrunched up in little balls like the rest, I ended up using this because it seemed to give the right effect as well as some slightly interesting patterns from the bubbles themselves, and it was a relief to find something that actually worked properly. I will probably try with carrier bags in the future though.

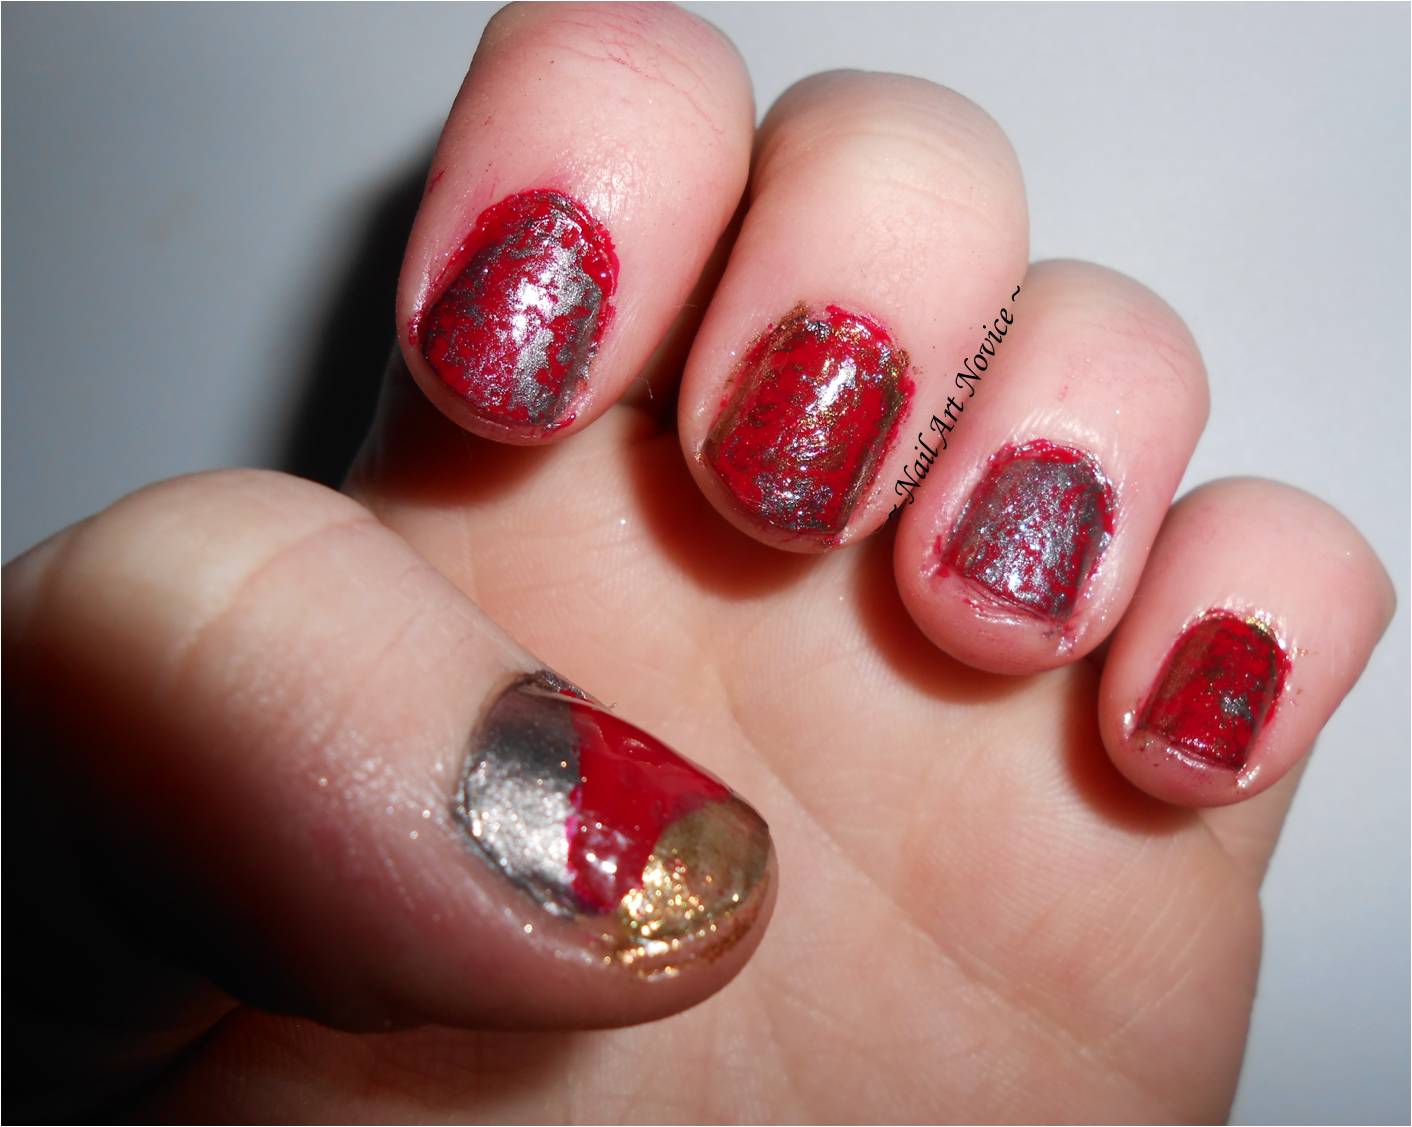
On to the mani. I knew I wanted a red base and wanted something that would work well with it rather than contrast against it for my top layers so I chose gold and silver metallic polishes. I used Number 7-Siren for my base, it's a very luxurious, proper red colour and applies very nicely. On top of that I used Loreal-Valiant and Colour Me-Pure Gold. These two look lovely together, as neither is a true gold or silver-Valiant is more of a metallic shimmery gun metal, and Pure Gold is a bit tarnished, less yellow than an actual gold colour.


Taken without flash to show that you can see the gold too


These were quite difficult to photograph, think the pattern is a little bit subtle for my camera, nevertheless I did my best. I was going to do the pattern the other way around on my thumb but decided in the end to freehand triangles onto them for ease (and because it was now 1am by this point and I couldn't be bothered any more!)


Overall then, I do like this technique, it gives interesting an fun patterns that are still delicate and subtle enough not to overwhelm, I'll definitely be doing it again only hopefully with less faff next time! At least now I know what works and what doesn't, I guess. I've seen some awesome ones with two layers of colours used on top which also look pretty cool, so I might have a go at that at some point too.

Edit 27/2
Actually the longer I wear this the more I like it, it's really quite pretty in bright light and every nail is different and in dull light you can tell there's a shiny pattern but it's not overwhelming. Ticks all the boxes, will definitely be doing this again!

~Nail Art Novice~

Sunday, February 24, 2013

Wishful Thinking

Spring is taking a long time to appear in Britain at the moment and it's really cold. This coupled with the fact that I've got a horrible head cold and am generally feeling a little worse for wear at the moment meant that I wanted something fun to put on my nails that might make me feel a little better. Rara came over the other night and we both decided to do some spring-inspired nail art. We were originally going to do the same thing but had different ideas in the end and did two completely different, but both awesome manis.

Firstly, polishes used:
Rara: Sally Hansen Insta Dry; Brisk Blue, Colour Me; Colour Me White, Barry M; Lemon Ice Cream and L.A. Colours Art DecoBlack
Me: China Glaze; For Audrey, London Girl; Shade 148, Rimmel I Heart Lasting Finish; Tangy Tangerine, Colour Me; Colour Me White, OPI; Suzi Loves Cowboys, Barry M; Mushroom and OPI; Don't Mess With OPI.

Although we didn't copy them exactly, we both took inspiration and techniques from this sky/clouds tutorial by Nailed It NZ and this cut out sunshine one from Gnarly Gnails.

The Manis
I started with For Audrey on all my fingers except for my thumb, which I painted with the yellow London Girl polish. Because I wanted this to be my sun, I sponged some orange on top to change the colour slightly. Next I did the clouds with a dotting tool, then the trees and flowers using nail art brushes and the ones in the polishes. I added a little bit of the lighter brown Mushroom over my Suzi Loves Cowboys to give the trees some texture and stop them being quite so dark before doing the suns as in the tutorial above.


Rara started with a base of Brisk Blue then added the clouds and birds as in the tutorial on all but her accent nails. She painted her suns on using Barry M Lemon Ice Cream which is a paler yellow than the one I used, then added the details again using nail art brushes.


We were a bit bored and messing around and decided that you definitely needed to see some pictures of them both together too (I promise I'm not just crushing her hand in the last one!) and you can see the differences in our nail shapes here, Rara's are much longer and thinner whilst mine are broader but shorter. Both lend themselves well to different styles of art though!


I loved Rara's little birds that looked like they were flying across her nails and the cutout suns impressed me too. I think they look pretty spectacular, both of them, although I'm really sorry to say mine have all but come off now, which is sad. I enjoyed having spring themed nails, even if it was still snowing!

Let us know which one you prefer in the comments!

~Nail Art Novice + Rara ~

Tuesday, February 12, 2013

Try Something Tuesdays-Going Dotty!

I want to introduce a regular feature to my blog, even though it's only just about a month old. I'm so new to this game that a lot of techniques and styles that seem to be common place to a lot of nail bloggers are still completely alien to me, and I want to get better, I want to get good at this. So I decided to utilise the expertise of my fellow bloggers and start Try Something Tuesdays. Every Tuesday (I hope) I'm going to find a tutorial for a new technique I haven't attempted yet, or a mani I want to attempt to recreate, or even something I want to do from somewhere inside of my own head and try it out, and then post the results. Some might work spectacularly, some might fail in a smeary blobby mess, but I'll keep persevering. I'll keep trying and trying again until I master everything that I want to master and evolve from a Novice into a proficient nail blogger. This is the hope, anyway.

I'm going to start this on my very first week with a polka dot manicure to match my gorgeous black and white rockabilly dress I might be wearing on Valentine's Day (which can be found here on Ebay as I don't have a picture in it yet)

I know this is (in theory) a spectacularly easy thing to master, but I think getting the right number and size of dots is going to be the tricky thing for me-I'm not very good at getting them consistent yet and my practises have ended up looking a little crazy. I'm going for a simple straight line pattern, rather than placing them randomly and hope it turns out a bit better.
I originally was just going to do black and white and keep it monochrome, but my black nail varnish isn't the greatest quality for dotting and I fancied a little splash of colour on my accent nails, which now looks a bit bonkers but I kinda like it.

Polishes used were: Number 17 Fast Finish in Nightshade, Colour Me in Colour Me WhiteRimmel I Heart Lasting Finish in  Block Your Green, Marks and Spencer Nail Colour in Blue (that, can I add, is definitely more purple), Number 7 in Siren (red), and Barry M in Cobalt Blue (which is getting a lot of use at the moment, but I shall try to give it a rest soon). I painted my accents (thumb and ring finger) white, and the rest of my fingers black, then pulled out my dotting tools.
Here's the results:

What's annoying is that I did actually bother cleaning up today.
Clearly I forgot my little finger *shakes fist*


Actually, I quite like them. They do look a little bit mad if I'm honest, and are probably a bit Lichtensteiny rather than true polka dots but they're an improvement on my practises in that they're all roughly the same size and a lot more evenly spaced out. Next time I try this I'll probably opt for the next size up dotting tool and make fewer bigger dots, rather than more smaller ones, as I think it'll look a bit neater overall. For my first Try Something Tuesday though, I'm happy, plus I think they'll look awesome with my dress if I actually get to wear it!

~Nail Art Novice~


Tuesday, February 5, 2013

Friendly Flowers

As I mentioned in my last post, that mani was created on a night where my friend did something rather more impressive that she's allowed me to share with you.
She's always loved ladybirds and when I happened to come across this beautiful ladybird/ladybug mani over at The Little Canvas I sent it to her because I knew she'd want to try it out. Alongside that she decide she wanted to some dotting tool flowers because she didn't want red polish on all of her nails. We practised together on a bit of old plastic packaging and were both surprised how easy the technique was to pick up and how effective it looked!
In total she used 8 polishes on her fingers, not including the base coat and top coat!


They were from L-R:
Number 17 Fast Finish in Nightshade, Rimmel I Heart Lasting Finish in  Block Your Green, Colour Me in Colour Me White, London Girl in un-named shade 148, Barry M in Cobalt BlueRimmel I Heart Lasting Finish in Double Decker Red, L.A Colors Art Deco in Black and a top coat of Rimmel I Heart Lasting Finish in Disco Ball. Phew! It was definitely worth it though because the results looked awesome! She kept The Little Canvas mani open for reference and then just freehanded her designs using the brushes in the polishes or dotting tools, and this was the result:


To say she's never really done anything like this before (neither have I for that matter) I was really impressed with how well this turned out and will definitely be trying both of these techniques soon. The design is so fun and bright, I know she's really pleased with it and so am I!

~Nail Art Novice + Friend~


Friday, January 18, 2013

Geometric Greens

I wanted to match my nails to a top I'm going to wear out tomorrow, which is black and white with green square patterns on it, so I decided to do a tape chequered flag manicure-my first ever as it happens.
I started with a white base (over my normal base coat), using Colour Me polish in Colour Me White. I never seem to have much luck with white polishes, they all seem  to be too runny or too gloopy or take forever to dry.
This one I seemed to be a little better than previous ones I've had, but still took a lot of coats to reach opacity.

Three coats and if you look at my ring finger it's still a bit streaky. 
However it did dry very quickly and went on fairly easily so definitely wasn't all bad. I think I might just have to suck it up and splurge on an OPI white next time I need one though.
Next layer (following 2 coats of Seche Vite and a good hour's wait), was green squares. I didn't take any photos of the process as it was a little fiddly with tape on all my nails but this was basically how I did it. The green I chose was a Stargazer polish but I've no idea what the name is as I've had it for years since my slightly gothy days. It's a slightly shimmery green which perfectly matches the green in my shirt.

This was the result, not perfect but not bad for a first attempt on my tiny nails!
I did um and ahh for ages about leaving them like this but decided I wanted a black line on them in the end, if nothing else to cover up unsightly edges where the tape lifted slightly, so this was the final result:


Obviously I need a bit more practice with the L.A. Colors thin line striper as some of my lines are a little too thick and a bit uneven but I'm overall happy with the results, particularly on my left thumb, which is pretty much perfect (although the photography isn't):


 Although it's been somewhat of a laborious process, I really like the end results and think I'll do this again when I've got the time to spare.

~Nail Art Novice~


Thursday, January 17, 2013

Polishy Goodness

I got a load of new polishes in the post (yay!) and I'm looking forward to trying them all out.

The best part is the most I paid for any of them was £1.99- they only cost me £16.50 in total, which for 11 polishes isn't half bad I don't think. I got most of them at http://www.fragrancedirect.co.uk/ which seems to be an awesome site for buying branded polishes for cheapy cheap (all £0.99-£1.50) and then got three of them at my local chemist.
They are:
Top Row L-R: Revlon in Plum Night, Sally Hansen Hard as Nails Xtreme Wear in Going Green, Sally Hansen Insta Grip  base coat (because my old one went gloopy), Colour Me in Pure Gold, Sally Hansen Insta-Dri in Slick Slate
Bottom Row L-R: Sally Hansen Maximum Growth in Real Royal, Sally Hansen Insta-Dry in Brisk Blue, L.A. Colours Art Deco in Black (it's a thin line brush for detailing), Revlon Top Speed in Cloud (which you can't really see the colour of in the photo, it's a gorgeous lavendery grey), Colour Me in Colour Me White, Revlon in Silver Screen

I have to confess I'm a fan of bright colours, so I'm really excited about the Going Green and Brisk Blue, but also think the Cloud is a gorgeous colour too. I'm wearing the Pure Gold on my toes right now and to say it was a cheap polish it went on really nicely and dried really quickly and looks lovely too!
I'm sure you'll see some of them appearing in posts soon.

Until then, then,

~ Nail Art Novice ~