Friday, November 1, 2013

Halloween Nail Art

Better late than never, ey!

I had intended to get these up yesterday but I ended up getting stranded in Sheffield at my boyfriend's house sans laptop so I've got them a day late. I used waaay to many polishes to list them all but my accents were Barry M-Satsuma with the Black Croc Effect on top and Rimmel-Trend Spotting topped off with the fab Pocket Money Polishes-I Put A Spell On You, which I just had to use because it's perfect for Halloween. I also couldn't have done these nails without my trusty Barry M nail art pen-they're seriously brilliant! For some of them I took ideas from this tutorial by cutepolish, and the rest I just made up as I went along.


And yes, that is a terrible pun name on my gravestone, I was quite proud of that, haha!

Hope you all had a fun Halloween and got more treats than tricks!

~Nail Art Novice~


Wednesday, October 30, 2013

Mish Mash Challenge Week 14-Pink

Now you might think that this isn't a pink-themed mani at all, but that it's actually a blue one with pink highlights and...well...you'd be entirely correct. See, the thing is, is that I am not a pink person at all-aside from socks (which don't count) I can't think of any one item of clothing I own that has pink on it. I just don't like the colour and never have-from the time I started defyingly dressing myself aged about four I've avoided it wherever I can. It's a miracle that I actually own any pink polishes at all! Actually, thinking about it, I didn't pay for either of the two I used in this mani-one came as a free gift with some polishes I bought and I won one in a giveaway. Anyway, what I'm trying to say is I don't like pink, so I didn't want to do an all pink mani, because I'd HATE it and take it off straight away. This, I feel is a happy compromise, hopefully nobody minds my bending of the rules too much!

Polishes used: Looney Lacquer-Love A Lot, Rimmel-Rose Libertine and Barry M-Guava. I did something that I've never seen done before (although I am by no means claiming to have "invented" it!) -a double laser taping mani. I started with a layer of Love A Lot, which is a very limited edition polish-I own one of the only 5 bottles in existence! It's a white creamy base filled to bursting with pink and red glitters of all sizes and colours, and there's some little hearts in there too. I actually like this a lot more than I ever thought I would-it's a really pretty polish! It's not very 'me' but it's definitely something I would wear, perhaps around Valentine's Day or something.

This is two coats:
Looney Lacquer-Love A Lot

I added a topcoat of trusty Seche Vite and once it was all dried I stuck striping tape randomly over each nail and added a coat of Rose Libertine:

Tape nail art over Looney Laquer-Love A Lot

Another layer of Seche Vite, another layer of tape and a layer of Guava finished it off:

Tape nail art over Looney Laquer-Love A Lot


So that's what I ended up with, my not-pink pink mani! I like it a lot more than I would if it were all pink, and I think the bright blue works really well with the subtler colours underneath it. I'll definitely be trying this technique again too, it's a bit time consuming but the effect at the end is really cool!

Don't forget to check out what the other lovely challenge ladies have done for their pink week manis (I imagine there's will be much pinker than mine, haha!)

~Nail Art Novice~


Tuesday, October 29, 2013

Nelly Polishes-Teal Holo, Bodmin and Autumn Teal

-PIC HEAVY POST-

Hello all! Today I've got swatches of the rest of the gorgeous Nelly Polishes I got the other day-Teal Holo, Bodmin and Autumn Teal (guess what colour I really like? Haha!). As before, if you want to find out more about these polishes I did an info post about them the other day here, and my other swatch post is here.

First up we have the super pretty Teal Holo...which isn't really a holo but is still lovely. Like the other Nellys I tried, this was semi-sheer but buildable. I swatched both with and without an undercolour as follows:

Thumb to little finger: One coat over one coat of Revlon-Emerald, three coats (no undies), two coats over Emerald, three coats (no undies), three coats over Emerald.

Nelly Polish-Teal Holo

Nelly Polish-Teal Holo

This is a really pretty combination-sort of dark green/black shimmer but it really lights up when you add some shiny top coat to it (all Nelly polishes dry matte because of the natural pigments they're made with!)


It's still not what I would consider a 'holo', perhaps a scattered one at best, but it's undoubtedly pretty! I love the colour and the glittery-twinkly-sparklyness of it. As it moves through the light there's blue and green and even some turquoise in there-it's really quite lovely!

Next we have Bodmin, which is from the Fungooms collection, inspired by characters from a children's educational website and named after places in the South West of the UK. Don't tell the others, but I think this one might be my favourite of the bunch I got-shh!

Bodmin is a gorgeous blue jelly with various sized gold pieces in. It starts quite sheer but builds nicely.

Thumb to little finger this is one coat of Bodmin over two coats of Maybelline-Dark Denim, four coats (no undies), two coats over Dark Denim, four coats (no undies) and three coats over Dark Denim.


There's still a hint of nail line visible so I would choose to wear this polish over a similarly coloured base, but you don't have to-it depends how opaque you like your polishes to be. It also looks fab with topcoat:


I love how adding a topcoat really brings out the sparkle of those gold glitters and brings them out in the other layers too.

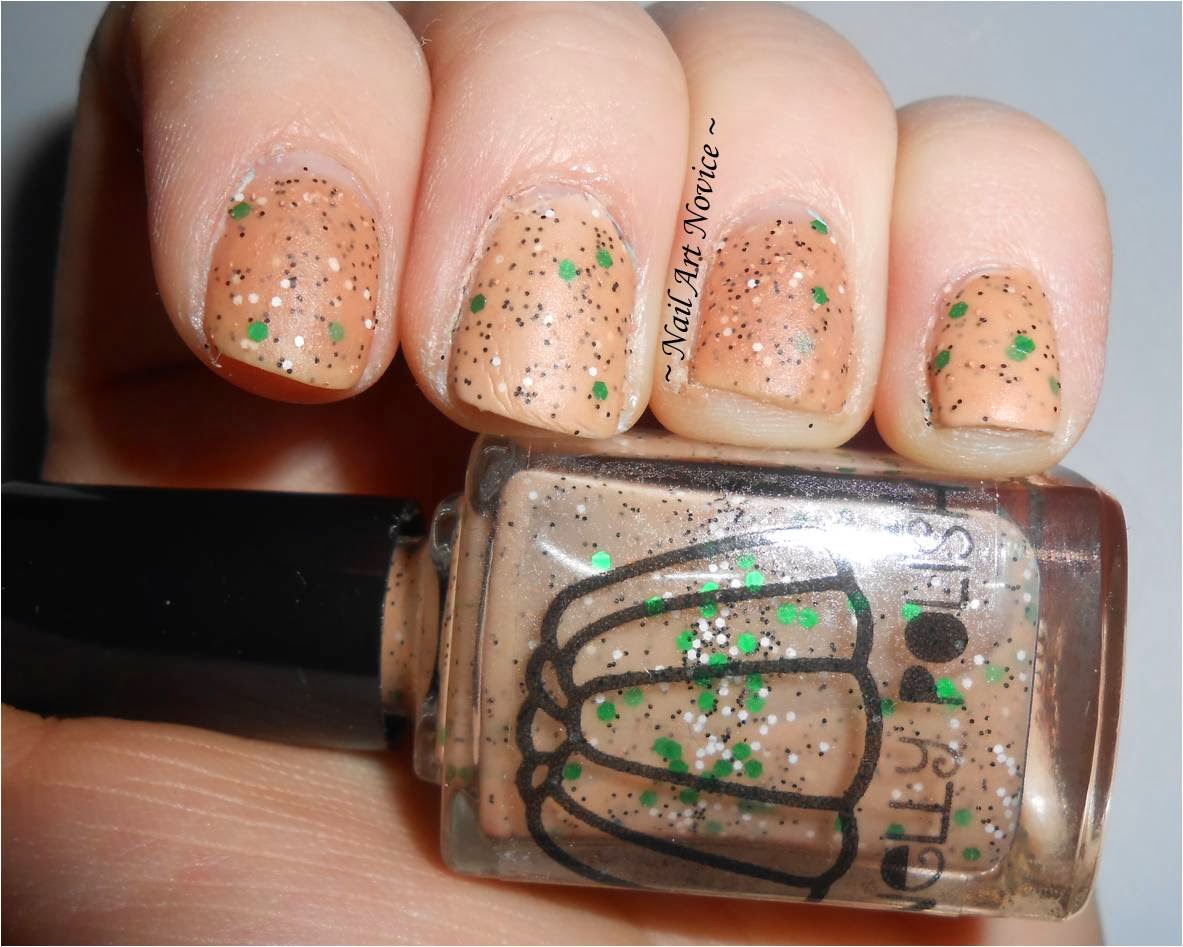
Last but not least is Autumn Teal from the Autumn line. Now I know this polish won't be to everyone's taste but it really tickled my fancy. It's an olive greenish jelly with copper and blue hexes in and I think it's really pretty! (The swatches on Etsy are a lot more teal than mine aere, so I guess I could have a slightly odd coloured one or something.) It's neutral enough to be work appropriate (I think), but with those glitters in to make it interesting.

Thumb to little finger: one coat over two coats of L'Oreal-Luxembourg Garden, five coats (no undies), two coats over L.G, five coats (no undies), three coats over L.G.


I actually really like the look of this one in its original matte state, but I added topcoat to see what it looked like:


As I said, I know this won't be to everyone's tastes but I love it! It's got a really autumnal feel to it. I wore a full mani of this for a couple of days and boy does it sparkle in the light!

So there you go, all my gorgeous Nellys! I'm so happy with them. They all went on pretty well, although I did find that a couple were quite thick (although this is undoubtedly due to my haphazard mixing technique) and this was easily remedied with a few drops of polish thinner. They dry fairly quickly due to the matte-ness of them so you don't want to hang about whilst using them.
Overall, I think they're great! I love the uniqueness of them-I've never seen dried nail polish before and it was really quite fun making them up myself. There's also some really interesting and unique combinations of colours in their range which is fab too!


You can buy Nelly Polishes from their Etsy store here-the dried sachets of mix are £3, the mixes in the bottles are £4.50 and the pre-made polishes are £5.50 (only available in the UK). There's also a 20% off sale running for the rest of October if you use code OCT20 at the checkout.

~Nail Art Novice~

Monday, October 28, 2013

Nelly Polishes-Gumpas and Jonah's Green

-PIC HEAVY POST-

So the other day I introduced you to Nelly Polishes-the world's first dried nail polish and today I've got some swatches for you. I know this is wildly out of my normal posting zone, but I think these are really pretty and just wanted to share them! I hope no-one minds the lack of nail art! For more information on just what exactly these polishes are and how they work, check out my first post.

In this post I have Gumpas and Jonah's Green.

Gumpas is a pretty nude coloured polish, with black and white specks of glitter, along with some larger green pieces. It's a very unusual combination-I've never seen anything like it before! I reckon it could easily be neutral enough to be deemed work appropriate, but with those little green freckles to add a dash of colour-lovely! It is from their Fungooms collection-inspired by a children's website run by the creator's husband, and all the polishes in this collection are named after places in the South West of England, where Nelly Polishes hail from. Personally, I love this idea! Very British =D

Because this is a very sheer jelly polish, I used undies on some of my fingers. From thumb to little finger this is: One coat over two coats of Barry M-Lychee, five coats (no undies), two coats over Lychee, five coats (no undies), three coats over Lychee. Despite the large number of coats, there is still some nail line visible on the nails with no undies, so I would definitely use a similar colour as a base before using this polish.

Swatch of Nelly Polishes-Gumpas


Because of the way these polishes are made (using natural pigments) they dry to a semi-matte finish. I added a layer of topcoat to see what Gumpas would look like all shinied up:

Swatch of Nelly Polishes-Gumpas with topcoat


Jonah's Green is from the Boy's Invention collection-named and invented by the creator's son Jonah. Jonah's Green is a lovely green crelly with gold glitter pieces. It was actually pretty opaque and wouldn't have needed a base colour underneath it. However, because it was so opaque, you didn't get that lovely sense of layers that you do with jelly polishes-it all but covered up the glitters in the underneath layers with each subsequent one, which is a shame. None the less, it's still a really gorgeous polish.

Thumb to little finger: Two coats over two coats of Cairuo-Blackberry 19, three coats (no undies), one coat over Blackberry 19, three coats (no undies), three coats over Blackberry 19.

Nelly Polishes-Jonah's Green Swatch

Nelly Polishes-Jonah's Green Swatch

As I said it doesn't need undies because it's very opaque, but you do lose out on some glitter. I think I'd probably wear 1-2 coats over a similar coloured base, simply because then you can see all the pretties better!

Again, I added topcoat to bring out the shine:

Nelly Polishes-Jonah's Green + Topcoat

This isn't very colour accurate for some reason-it was actually darker than this on the nail, and I tried to get a better picture representing the true shade for you-it's a really nice tealy green:

Nelly Polishes-Jonah's Green + Topcoat

Both polishes went on quite nicely-obviously they're a bit different to normal polishes due to the way they were made, and I can't claim to have got the formula perfect so they might perform slightly differently for you. There were some visible brush strokes, but these were smoothed out with topcoat. Jonah's Green was quite thick to start with but I think this was my fault more than the mix's, and once I added a couple of drops of polish thinner it was fine. They dry fairly quickly, which is good!

You can buy Nelly Polishes from their Etsy store here-the dried sachets of mix are £3, the mixes in the bottles are £4.50 and the pre-made polishes are £5.50 (only available in the UK). There's also a 20% off sale running for the rest of October.

So that's two of my Nelly Polishes pretties, more to come soon.

~Nail Art Novice~

Sunday, October 27, 2013

British Nail Bloggers Halloween Challenge


The British Nail Bloggers are having a mini, no pressure, Halloween Nail Art Challenge, and I thought I'd get in on today's prompt which is 'What's lurking in the dark?' with some simple nail art inspired by My Little Canvas. I used two coats of W7-Black for the base and then added white eyes with Barry M-Matt White. On top of the white I added a coat of Astral Lights glow in the dark polish (it's about 10 years old!) and then 'irises' in Barry M-Mango, Key Lime, Rimmel-Rose Libertine and Revlon-Electric. Once these were dry I added pupils with my black Barry M nail art pen.


Haha, these are utterly ridiculous but I'm really enjoying them! Check out the other cool designs in the inlinkz too!

~Nail Art Novice~

Saturday, October 26, 2013

Introducing Nelly Polishes!

I have genuinely no idea how I stumbled across Nelly Polishes but when I did I was immediately intrigued because they are billed as 'the world's first dried nail polish!'-I mean wouldn't you want to know what it was all about?! The scientist in me just had to know more-so I read some reviews and I read all about them on their site, and then I went on their Etsy page and helped myself to five bottles-oops! 

You can buy Nelly polish (from their Etsy shop) in three ways-in a sachet form (which you add to 10mls of any clear polish of your choice), dried in the bottle (which you add the clear polish to) or pre-made in the bottles (UK only). I went for the dried in the bottle version-although slightly more expensive than the sachets it would mean I wouldn't have to find bottles to put them in, plus I loved the logo on the side!


This is how they arrived:

Dry Nelly Polishes-Gumpas, Jonah's Green, Teal Holo, Bodmin, Autumn Teal
L-R: Gumpas, Jonah's Green, Teal Holo, Bodmin, Autumn Teal

Nelly Polishes-Autumn Teal Dry
Autumn Teal
As you can see they're sort of pigmented powders at this stage, of the same sort of consistency of loose eyeshadow powders. Next came the fun part-adding the clear polish to them. I used L.A Colors clear polish, for the simple reason that it was cheap (£1/bottle) and easily available to me in the pharmacy around the corner. And it was not a tidy process-there was a LOT of mess. L.A Colors come in 13ml bottles so I had to use a syringe to get the right amount into the Nelly bottles and there was clear polish and little bits of coloured powder and glitter everywhere by the time I was done. My polishes have all ended up with different fill levels because of it, but I like knowing that I got to mix them myself-it was kinda fun! It also gave me a new kind of respect for indie makers-shaking them all by hand until they were mixed properly was a bit of a work out, phew!

This was what they looked like once I'd added the clear polish to them all:

Nelly Polishes made up-Gumpas, Jonah's Green, Teal Holo, Bodmin, Autumn Teal
L-R: Gumpas, Jonah's Green, Teal Holo, Bodmin, Autumn Teal
and as you can see, the colour of the original powders is no real indication of the colour they will be once they're finished.

The polishes come out like jellys-sheer but build up opacity fairly well in most cases, although I personally would wear them over a base colour because I'm not a fan of VNL. They dry to a semi-matte finish which is perfectly wearable on its own, but they really come alive with a layer of glossy topcoat, I think. I had some trouble with a couple of mine being quite thick at first, which I think is probably due to them getting less clear polish than they should have done, but once I added a couple of drops of polish thinner this smoothed out just fine. I also noticed some undissolved powder with the first couple of uses but I just popped the lid back on and gave it another good shake and this seems to have resolved the problem!
The awesome thing about these polishes is that they can be shipped anywhere in the world legally-because the dried versions are totally safe to transport (It's the solvents in nail varnishes that mean that they're "dangerous" to move around!). They're also really different-I've not seen colour combinations like this before.

You can buy Nelly Polishes from their Etsy store here-the dried sachets of mix are £3, the mixes in the bottles are £4.50 and the pre-made polishes are £5.50 (only available in the UK). There's also a 20% off sale running for the rest of October-so get them while they're hot! I've got swatches of my five coming up over the next couple of days, so keep an eye out for them!

Wishing you a good weekend!

~Nail Art Novice~

Thursday, October 24, 2013

Mish Mash Challenge Week 13-Rainbows

I always knew I would love this week because I'm a massive rainbow fan-they're so bright and colourful and never fail to make me smile-whether in the sky or on my nails! This design was inspired by a couple of things-firstly by my boyfriend's idea in 'tape week', because his gradients looked really awesome, and secondly by an awesome glitter that I bought in a blog sale a couple of weeks ago. To combine them together I used the glitter over black and then did rainbow accents.

Polishes used: W7-BlackBarry M-Passion Fruit, Mango, Spring Green, Blue Grape, Revlon-Electric, Sinful Colors-Amethyst, Seventeen-Monochrome Graffiti Effects and Krafty Gurl-It's A Fiesta.
Here's what I ended up with:


Can you believe that this is only one coat of that Krafty Gurl glitter? SO MUCH PRETTY. I love love LOVE this mani, it's awesome and amazing and I don't want to take it off ever ever ever. It's making me happy =D

Don't forget to check out all the other rainbow coloured brilliance in the inlinkz below!

~Nail Art Novice~